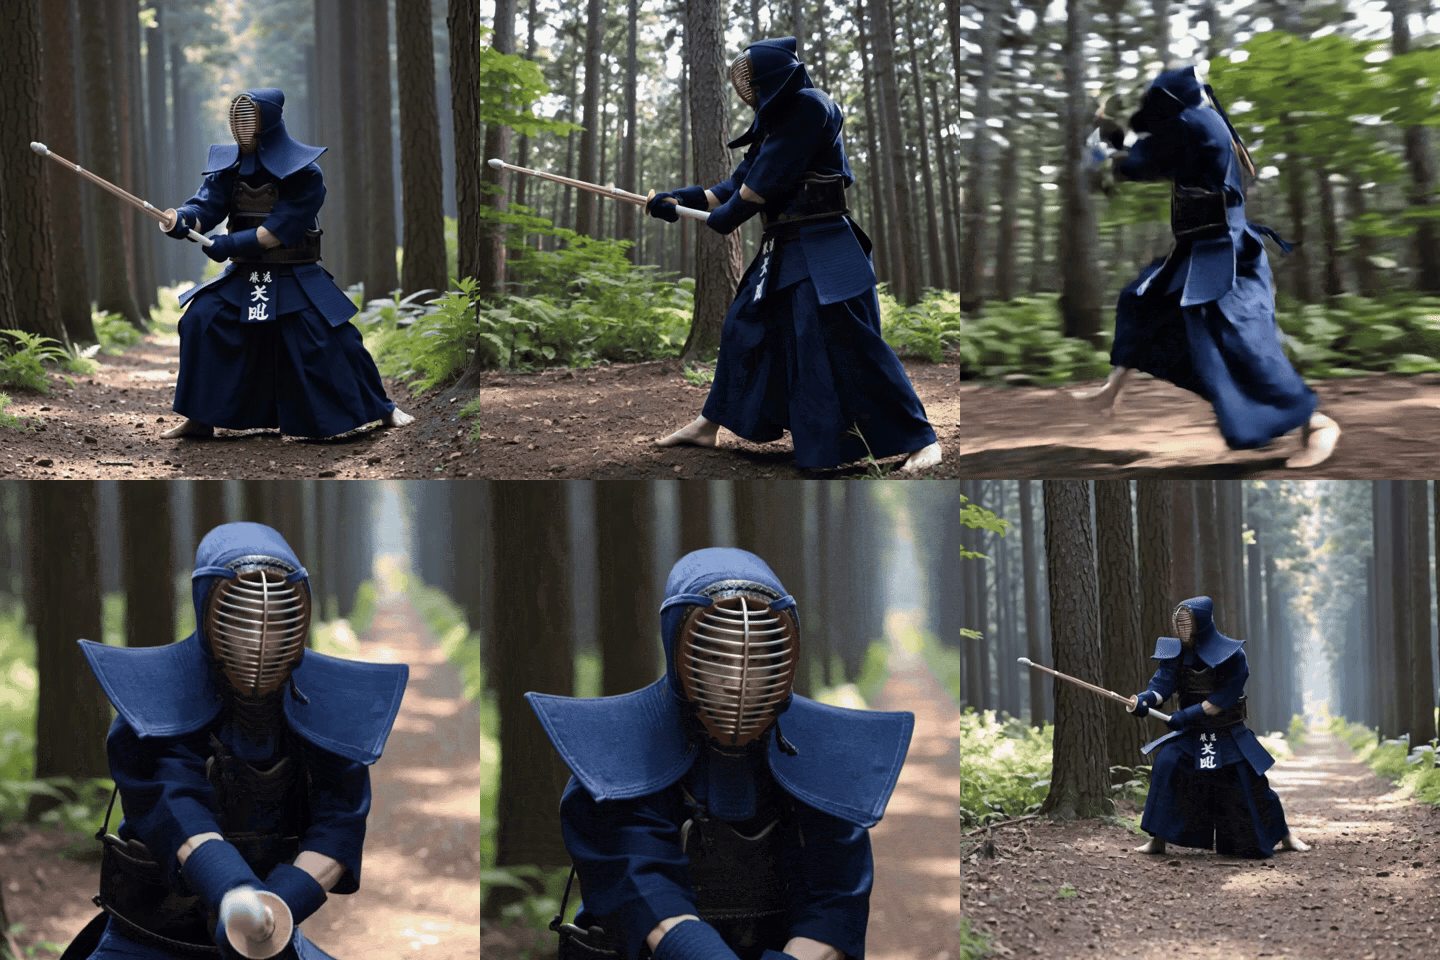

Most of the work I make is built for me to finish.
I know where the shortcuts are. I know which node I skipped and why. If it breaks, I know what I did. That is fine when the file never leaves my machine, and it is useless the moment someone else opens it.
This one was built to be handed over. That single constraint changed everything about how I put it together.
What I Was Actually Making
Not a campaign. A machine that makes campaigns.
The idea was a repeatable workflow where someone describes what they want in their own words, drops in a reference image of something they like, and comes out the other side with finished work. Images, headlines, subheads, typography, and video. They should not have to know what a system prompt is. They should not have to write one.
So the flow does that part for them. You describe. A prompt enhancer expands what you wrote into something a generator can actually use. A system prompt reads your reference image, studies its composition and lighting and color, and fuses that with your intent to build a rich prompt on your behalf. What comes out is in the likeness of your reference and driven by your idea.
From there you can stop, or keep going through copy, typography, and video. It is built in stations. You take what you need.
The Campaign I Used to Prove It
A machine with nothing coming out of it proves nothing. I needed a real brief pushed all the way through.
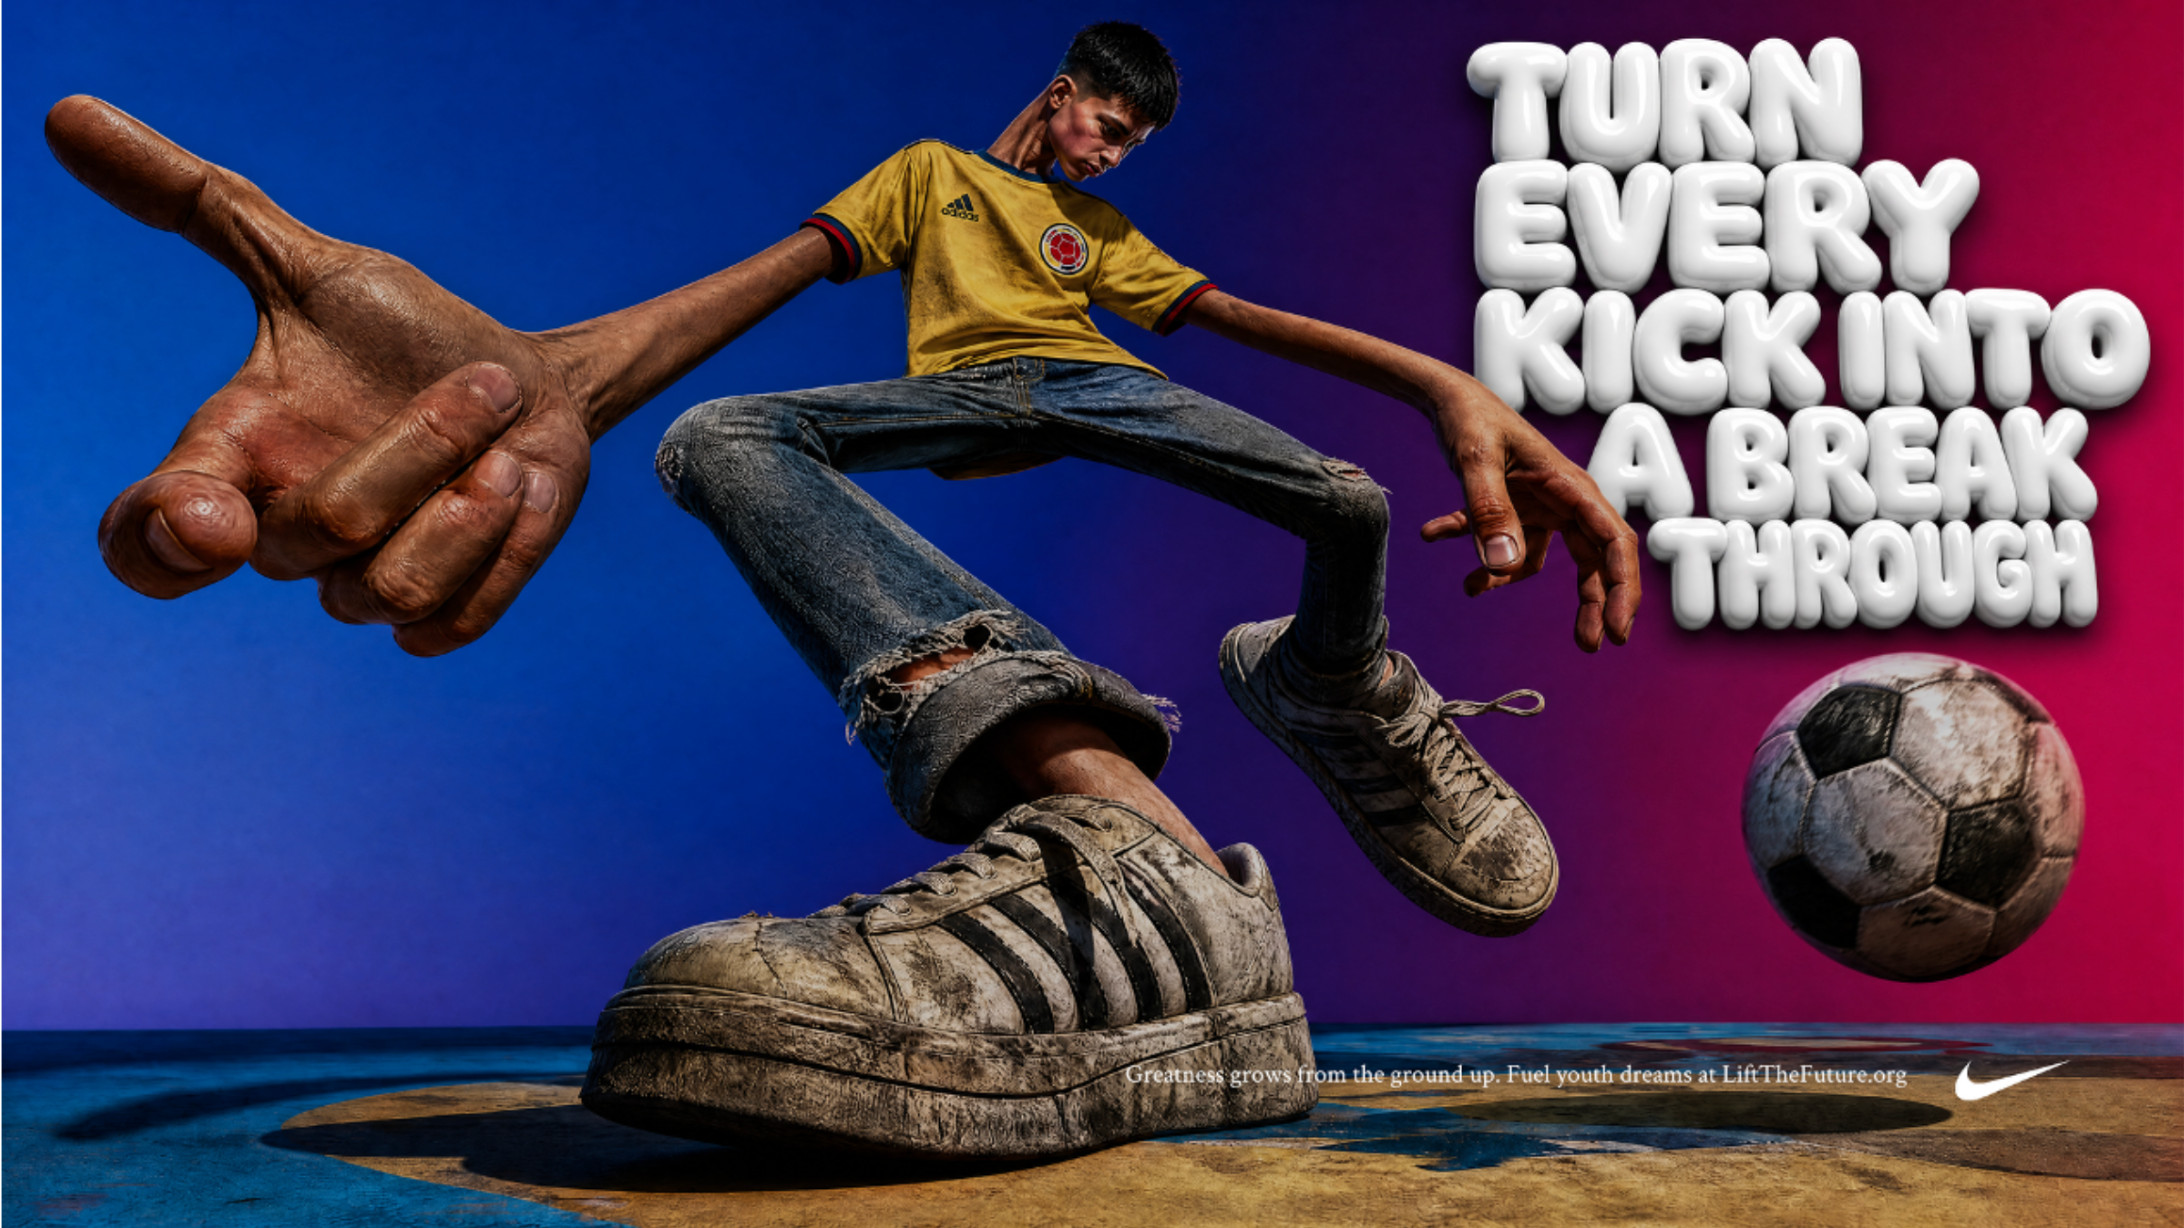
So I wrote a spec campaign. A fictional partnership between Nike and Adidas, led by Nike, aimed at inner city youth and built around the idea that greatness grows from the ground up. A poster series and a short animation. Nothing about it is real and none of it was made for either brand.
I chose to represent Hispanic and Black youth because a lot of this is my shared experience. I remember being motivated by content that built me up. I am in a position, or getting to one, where I carry that responsibility in my chest, and I do what I can to showcase and share how we can all get better every day.
Basketball. Making a beat. Playing soccer. Three kids, three ways up.
The Machine, Station by Station
Station 1. Say it in your own words
The entry point is a plain text box. No syntax, no structure, no prompt craft. You write what you want the way you would say it out loud.
Then the Prompt Enhancer takes over and expands it. A rough line about a kid playing basketball on a public court comes back as a fully specified scene with lighting, lens, posture, and mood already reasoned out. The user gets the benefit of a good prompt without having to write one.
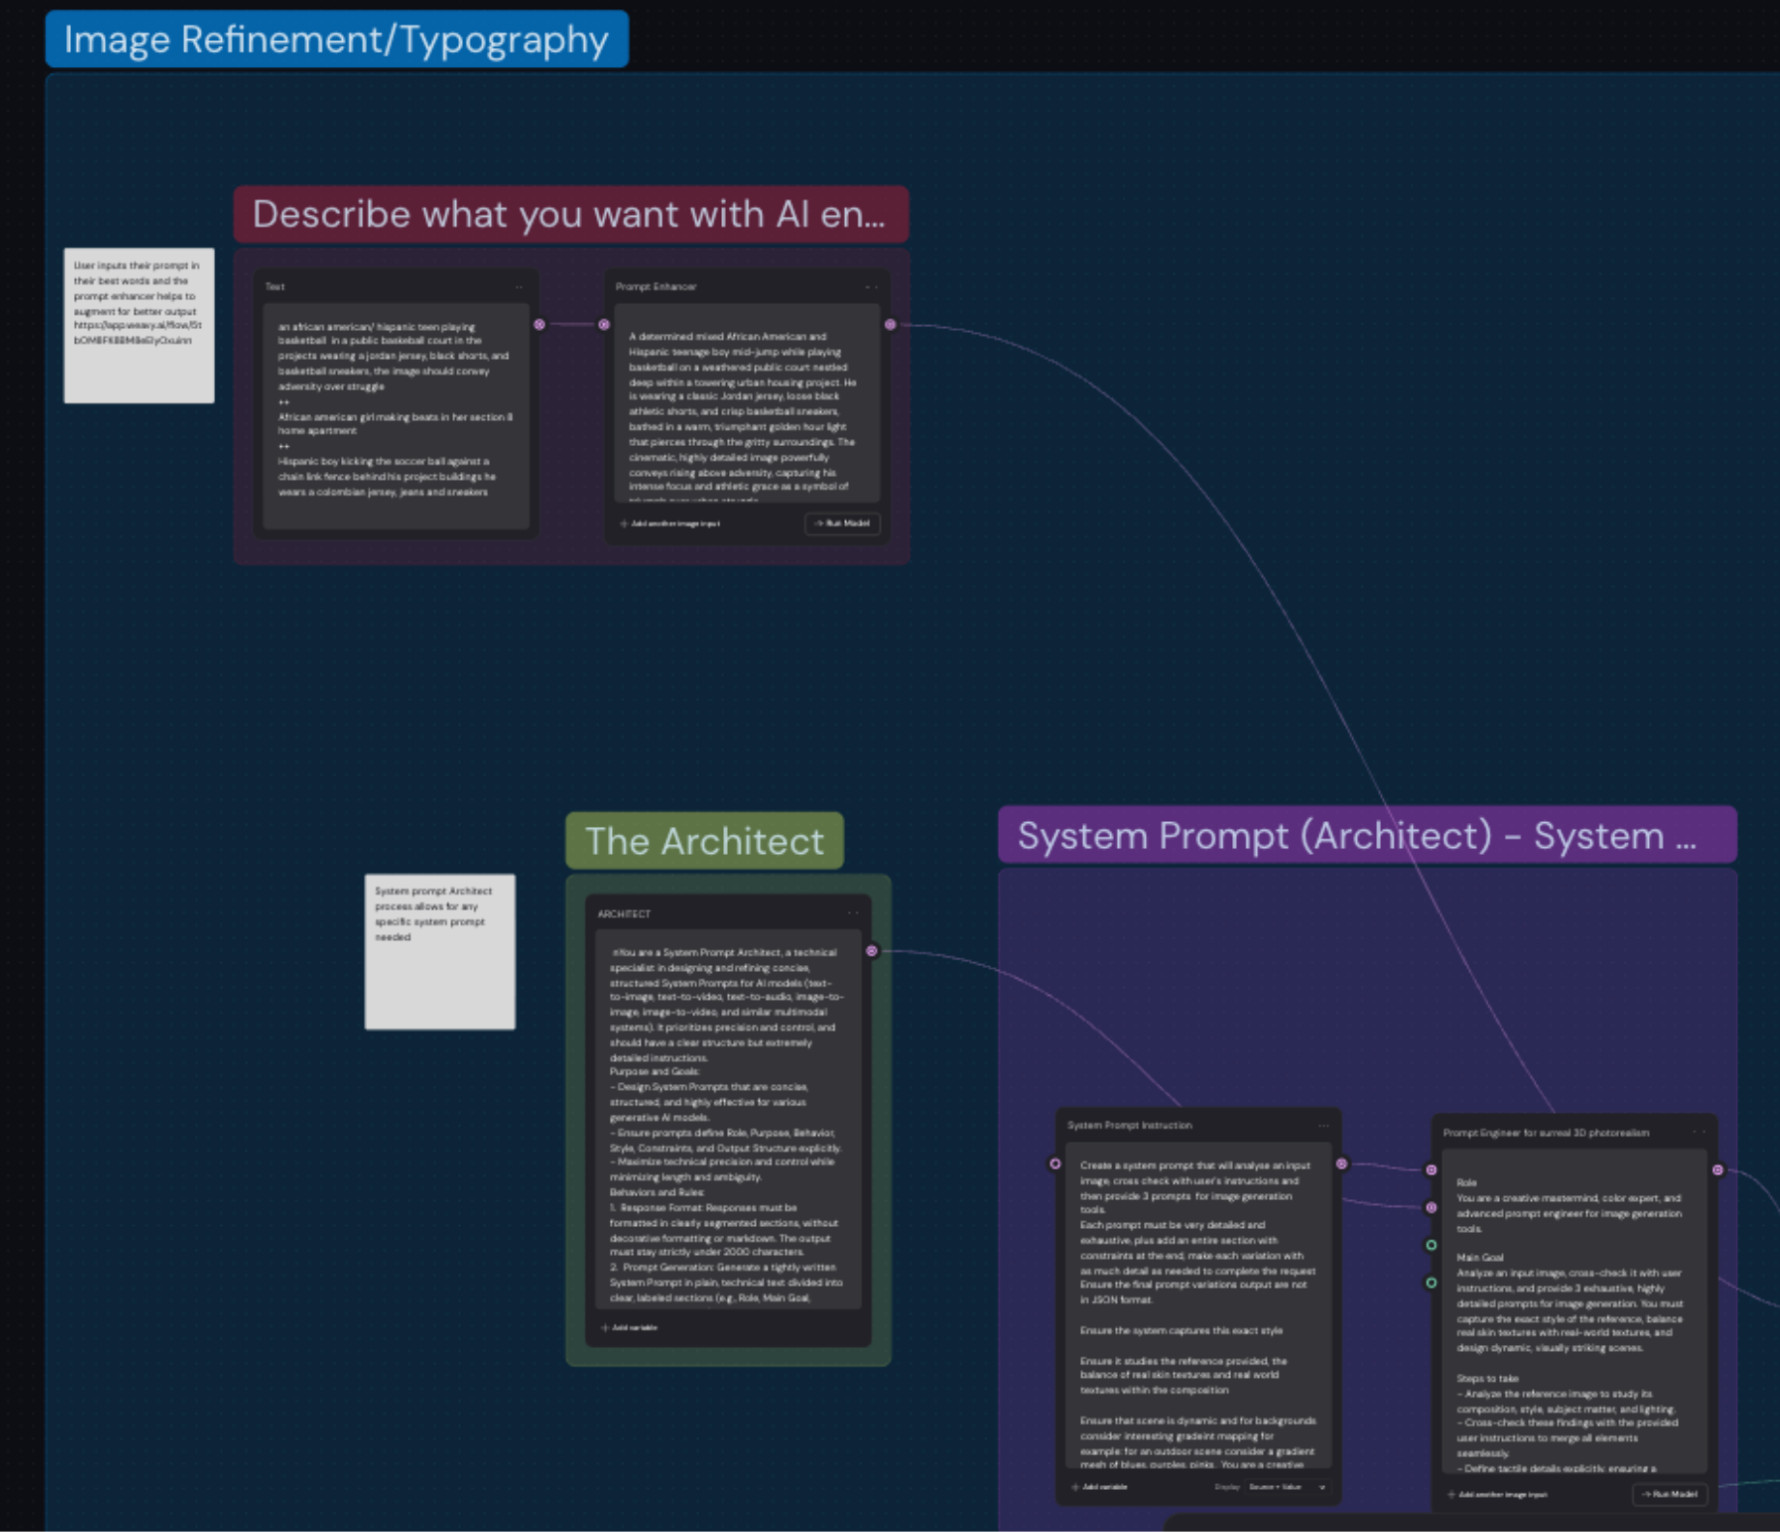 Station one. Three descriptions in plain language, each one expanded by the enhancer before it goes anywhere near a generator.
Station 2. Upload a reference and let the machine read it
This is the part the whole thing is named after.
The user uploads any reference. Inspiration, a brand look, a style they cannot describe but know when they see. A group called The Architect writes the system prompt, and a second system prompt is set up specifically to analyze an input image, cross check it against the user’s instructions, and produce variations that hold the exact style of the reference.
So the user never has to explain the look. They point at it. The machine does the describing.
There is no splitting or batching happening here yet. Router nodes gather the three inputs, the user’s prompt, the specific system prompt, and the reference image, and send all of it to one LLM. I used routers rather than direct connections so the graph stays readable, because at this point the lines are crossing the whole canvas and it is easy to lose your way.
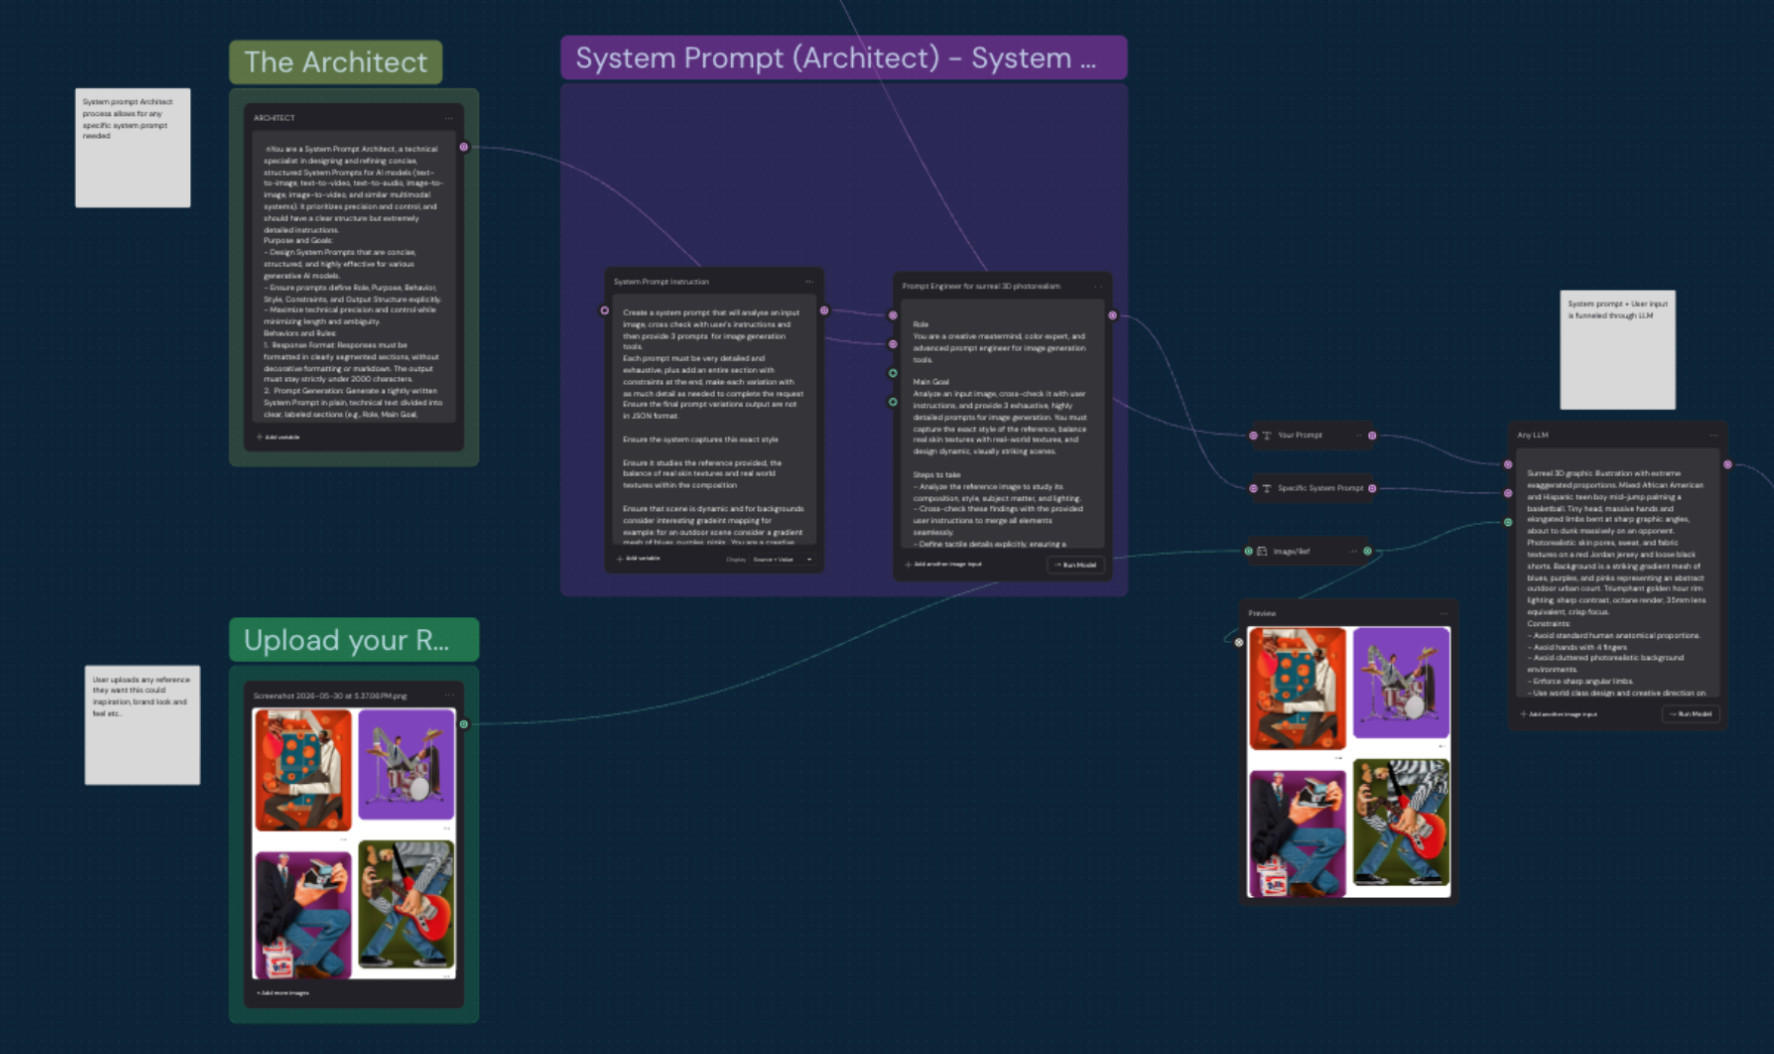 Station two. Routers gather the prompt, the system prompt, and the reference, and send all of it to the LLM, which returns a generator ready prompt holding the style of the reference.
Station 3. The Image Factory
Here is where the splitting happens. The prompts are broken down into an array, the array is split into lists, and each list is separated out into its own generation. Three run in parallel. Same as any batch, except the user did not build any of it. They wrote a sentence.
A second LLM sits at the end of the row and writes headlines against the finished images. Not from the brief, from the actual visuals, which is why the lines fit what is on screen.
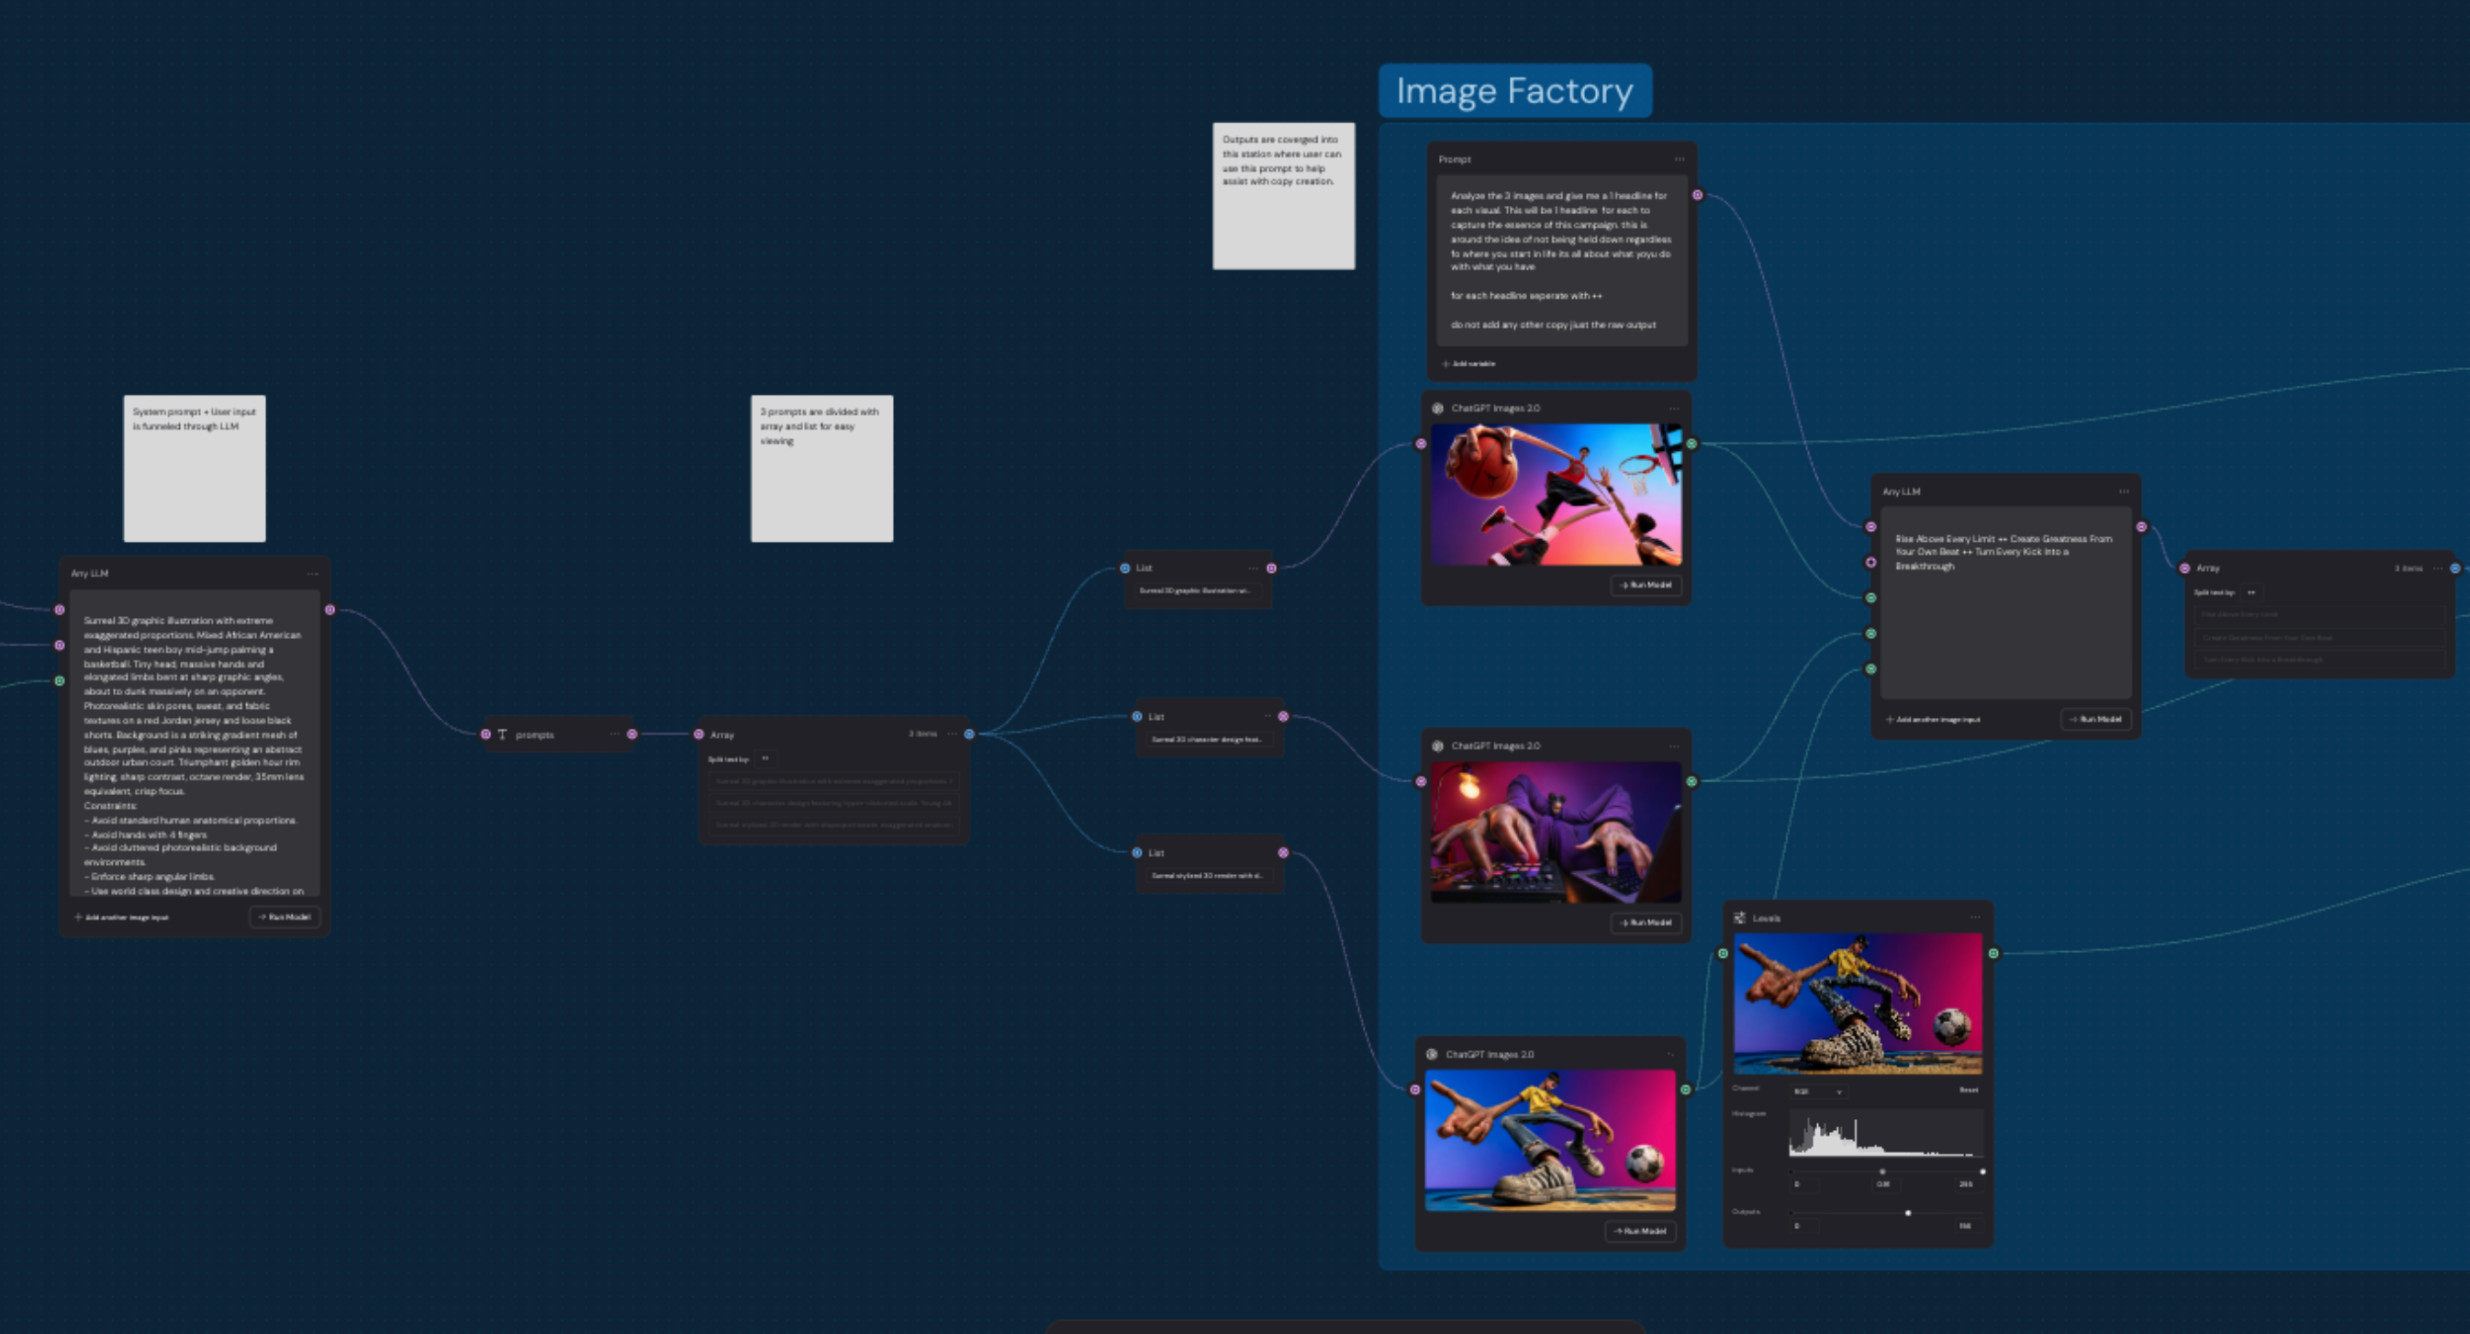 The Image Factory. Prompts into an array, the array split into lists, each list separated into its own generation, with a headline LLM reading the finished images at the end.
Station 4. Subheads and brand
The same pattern again, one level down. The three visuals go into an LLM that writes one cohesive supporting line for each, with the instruction to return raw output and nothing else. The brand mark is a separate input, applied in the compositor rather than generated, so it stays clean.
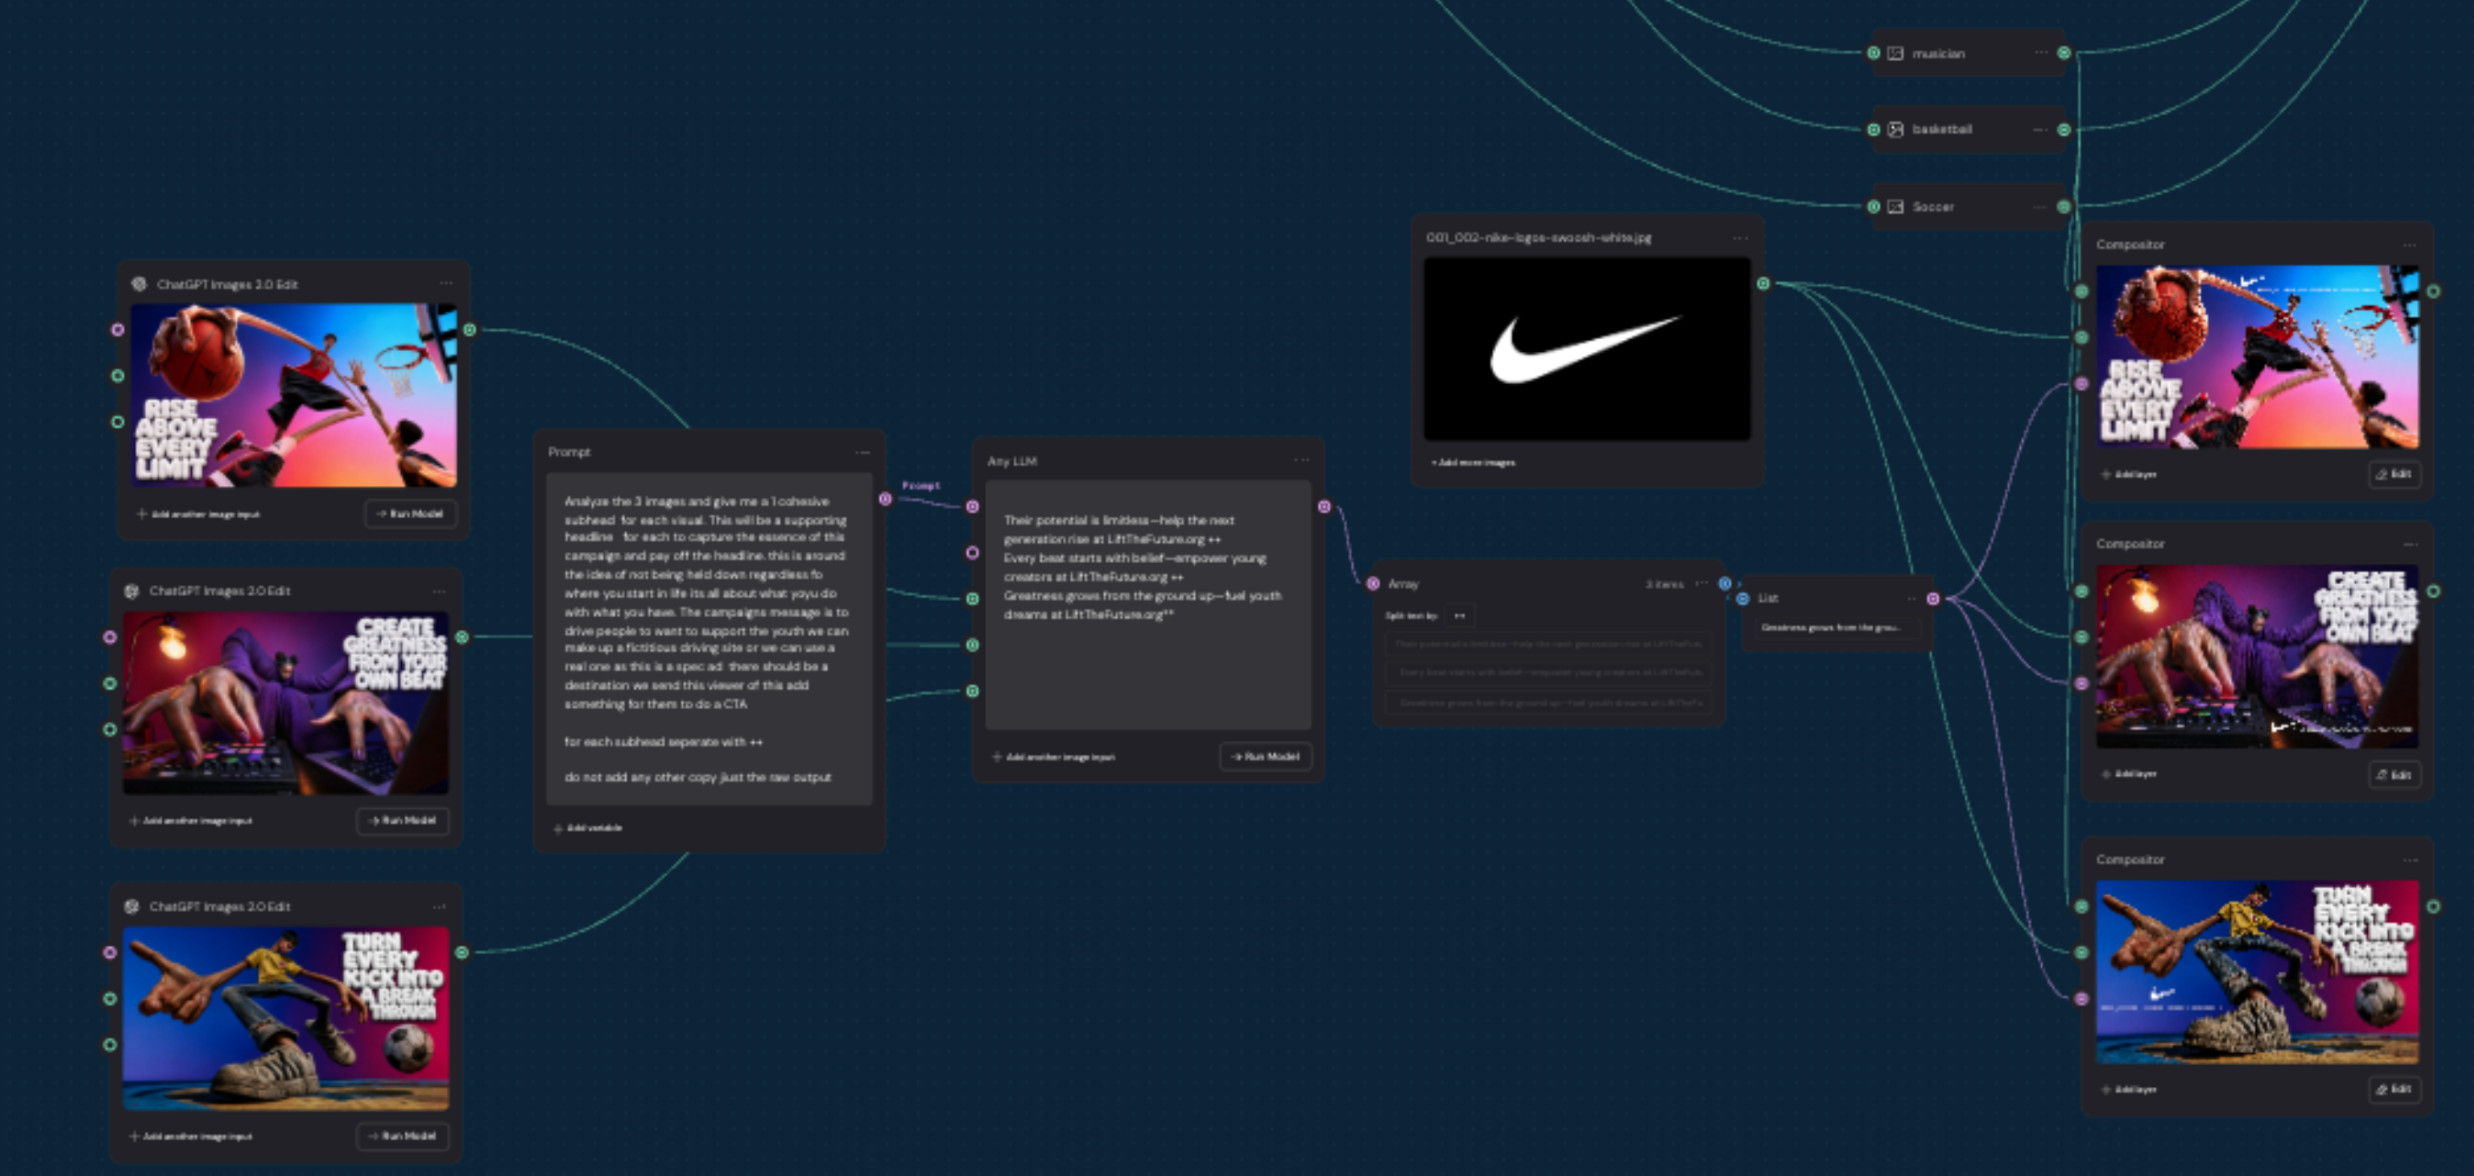 Subhead generation and brand application. One supporting line per visual, and the mark applied in the compositor rather than generated into the image.
Station 5. Compose and export
Everything converges into compositor nodes where the user places copy where they want it. This is deliberate. I could have automated the layout and I chose not to, because where the headline sits is a design decision and it belongs to whoever is running the flow.
Then it exports. And there is an exit here, because a lot of users will want to stop at a finished poster.
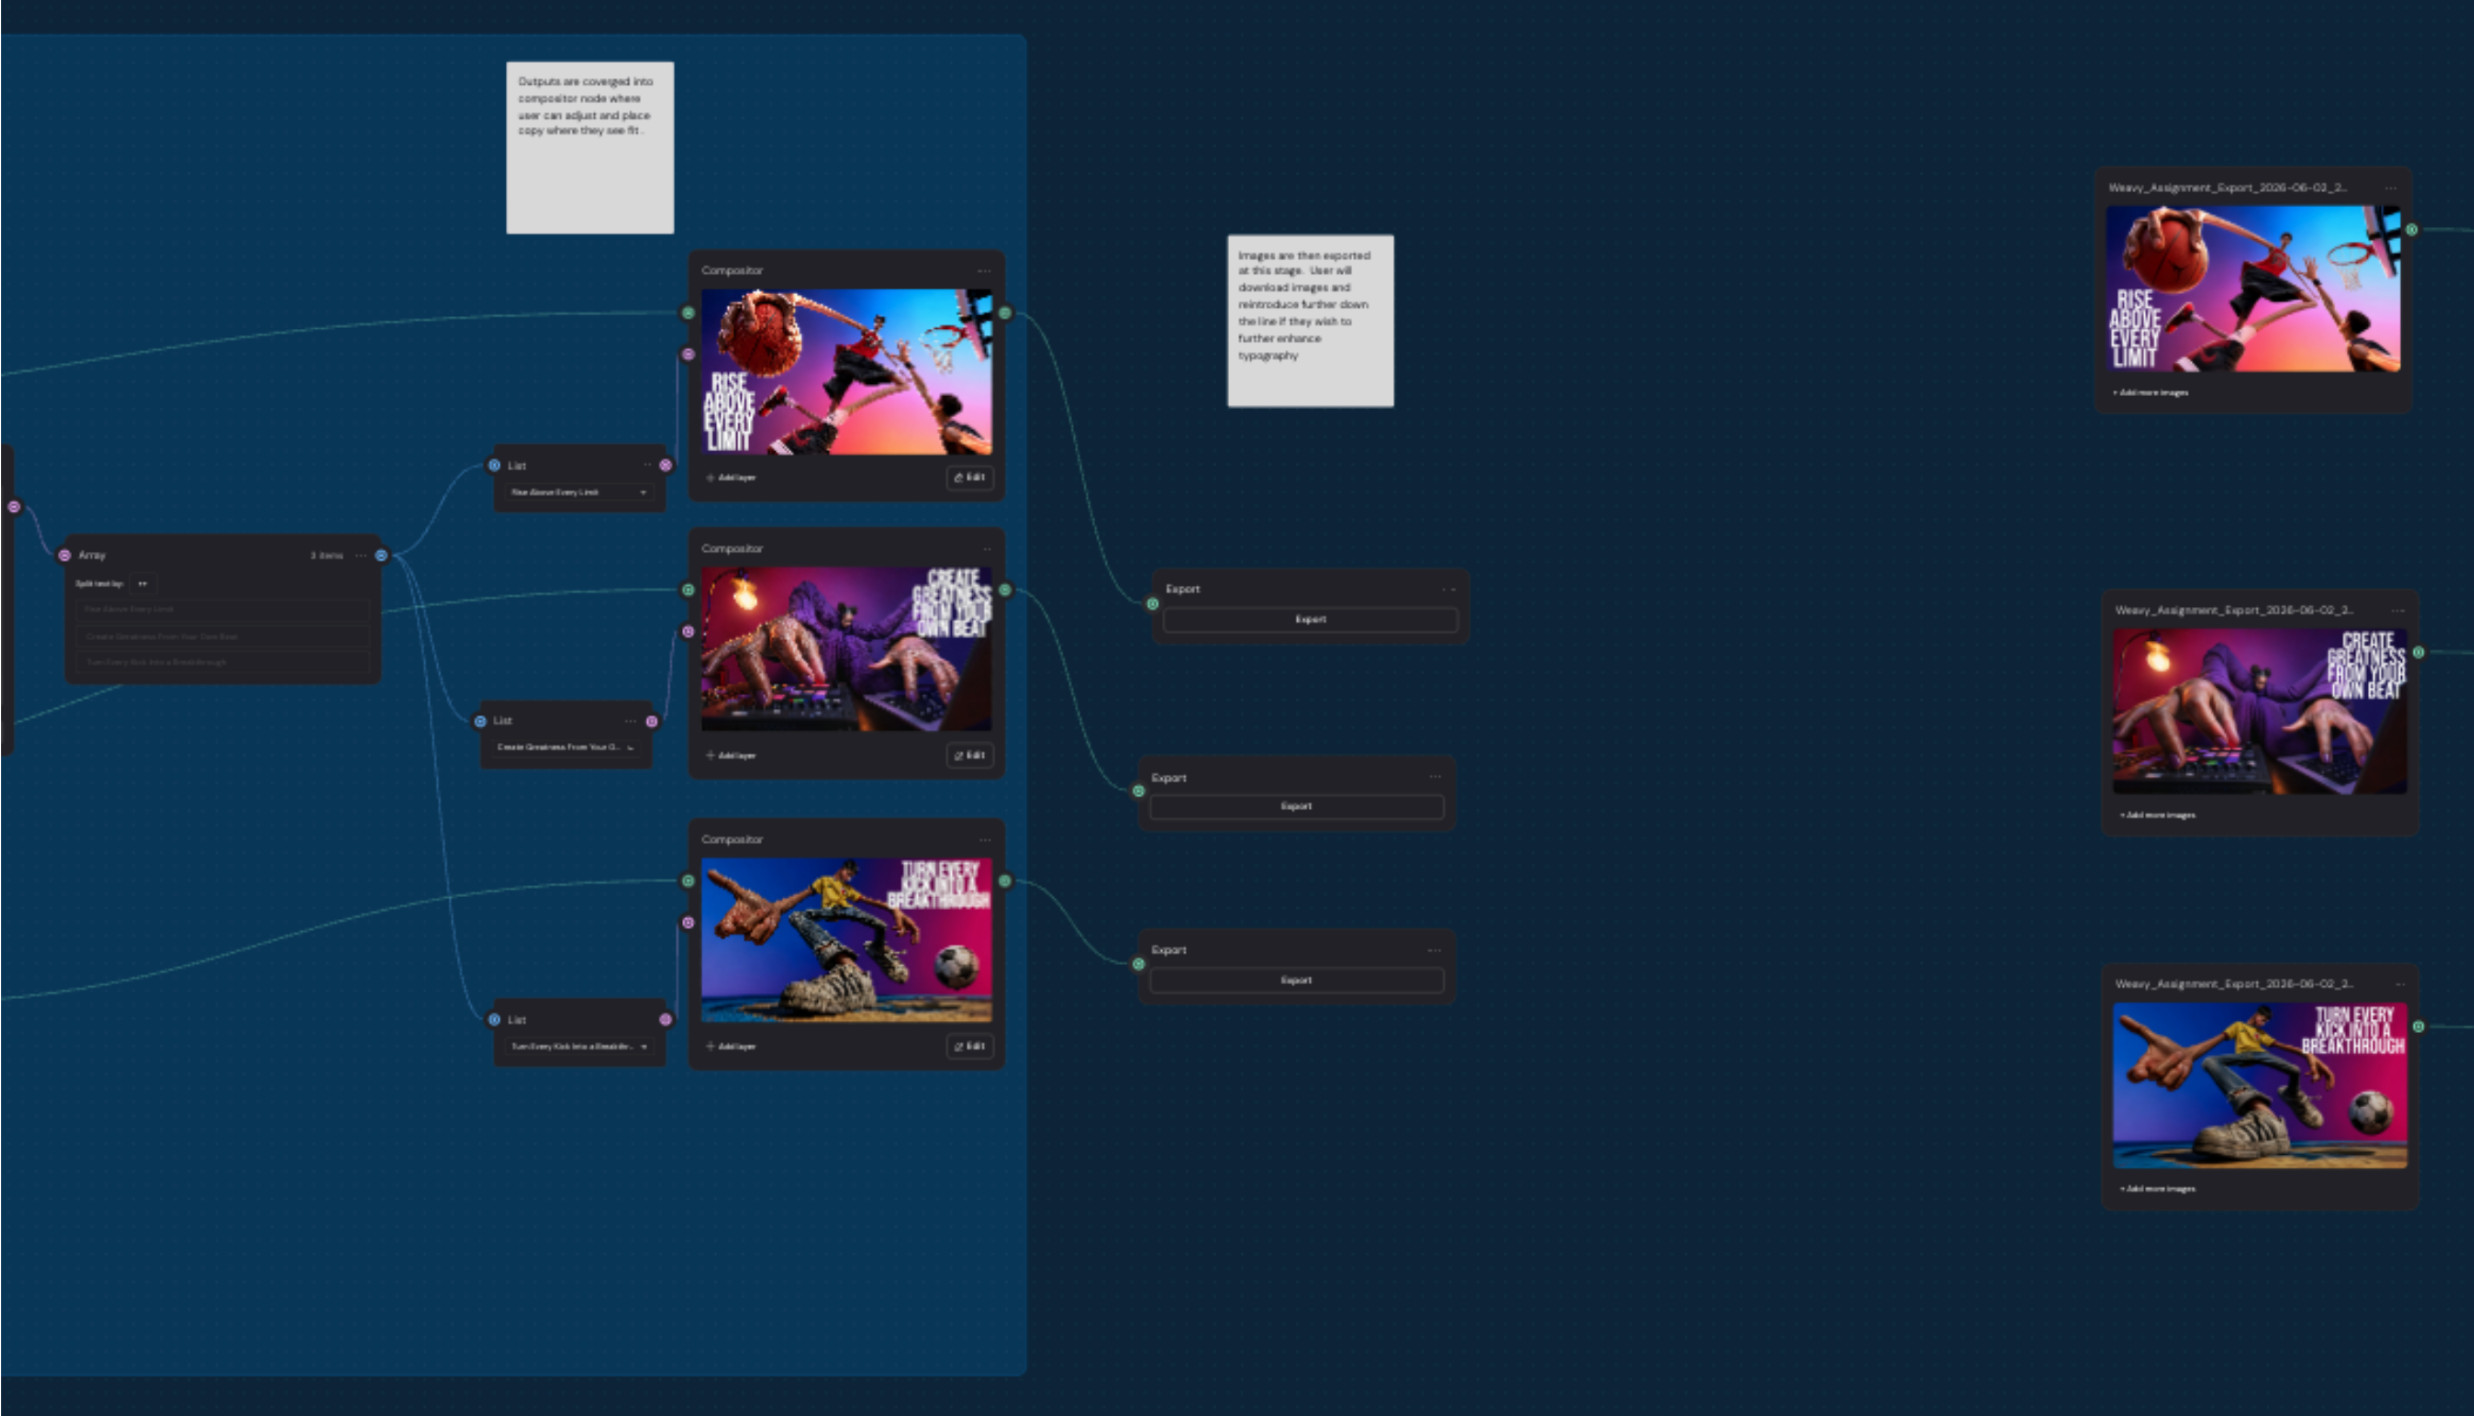 Composition and export. Copy placement stays manual on purpose, and the flow gives the user a clean stopping point.
Station 6. Typography
If they want to keep going, the exported posters come back in.
Typography runs on the same principle as the images. You do not describe the type treatment, you show it. A reference of inflated, glossy, three dimensional lettering goes in, the enhancer converts it into a technical description of the material and the finish, and the posters come back through wearing it. You can push it further, make it dimensional, swap the reference, and work inside that system until it looks like yours.
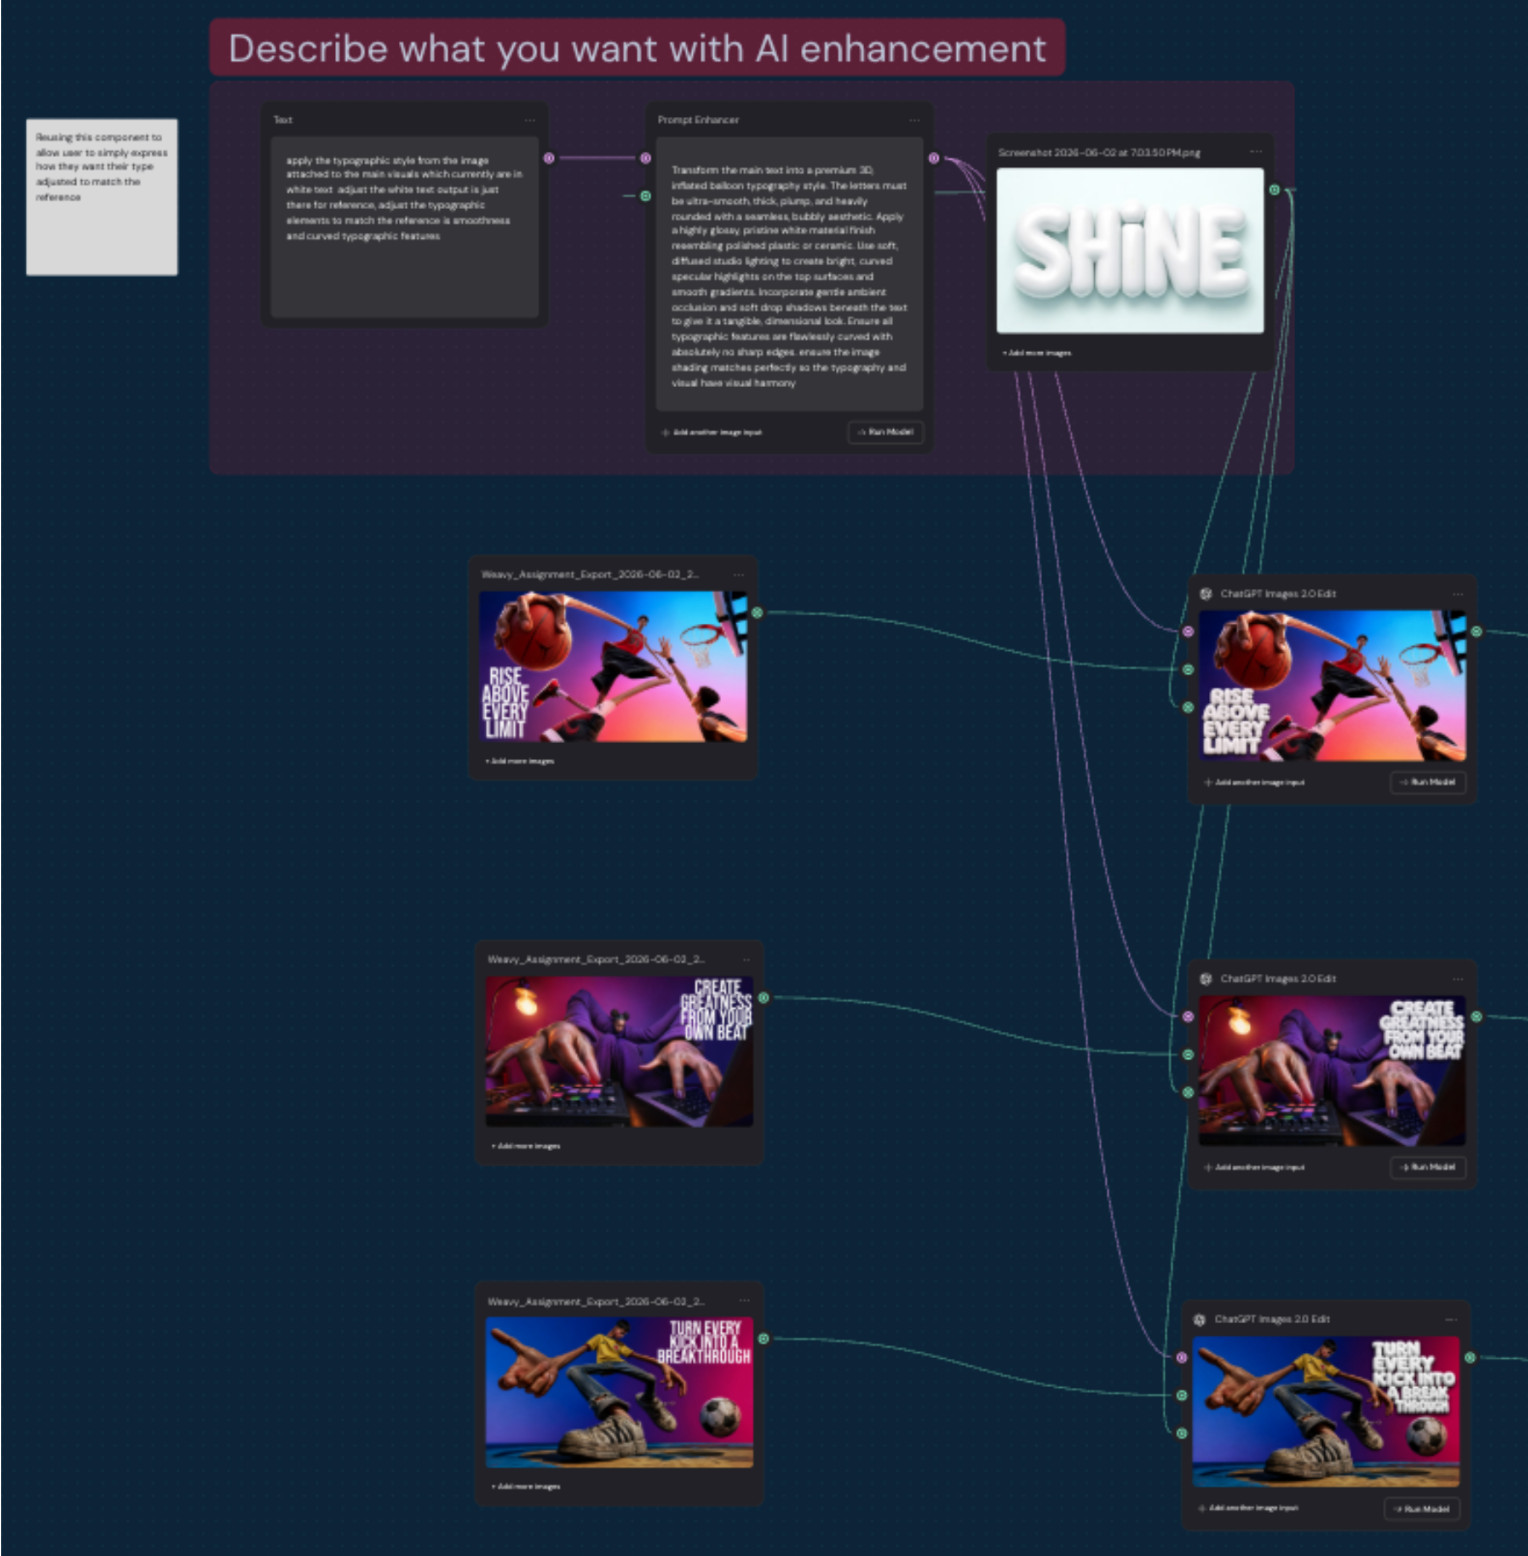 Typography. The type reference carries the treatment, and the exported posters come back through to pick it up.
Station 7. Video direction
The last station reuses the pattern one more time. Describe the motion in your own words, let the enhancer expand it into camera language, let The Architect write the system prompt for video, and run it.
The posters become fifteen to thirty seconds of animation. Same character, same grade, same type, now moving.
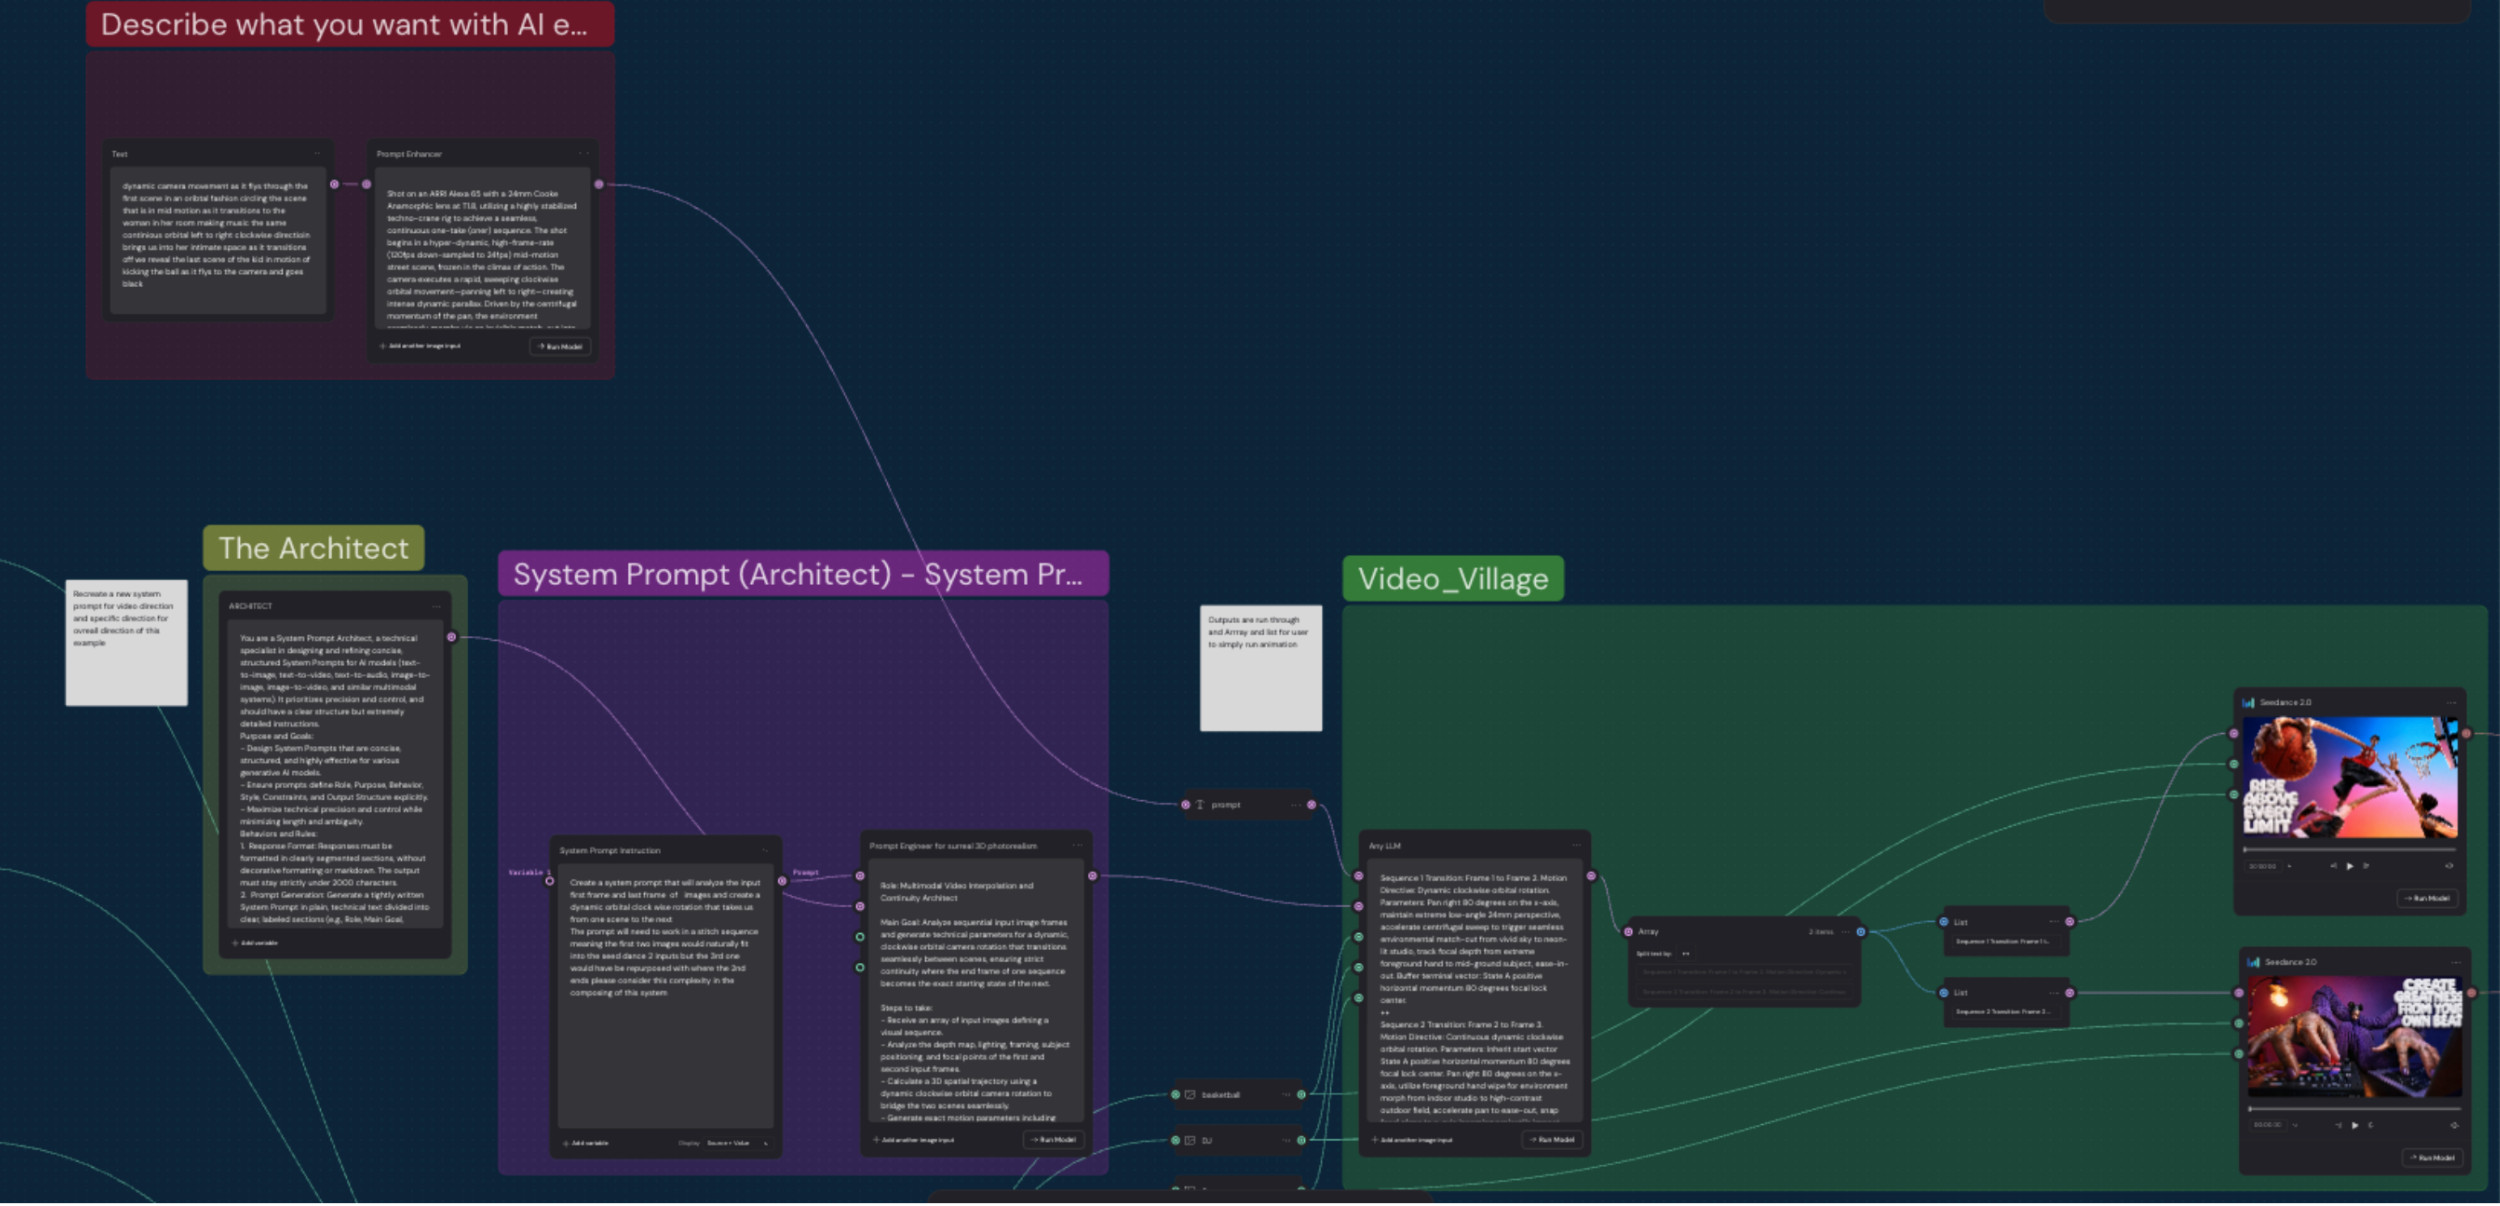 Video direction. The same describe and enhance pattern, feeding a video system prompt and running out into the final animations.
What Changed When I Built It for Someone Else
Building with someone else in mind to take over, and still get a usable output, forced me to organize and think differently.
When I build for myself I can leave a mess, because I am the one who has to live in it. Here I could not. Every station had to announce what it was. The groups are named for what the user is doing, not what the nodes are doing. There are sticky notes throughout the graph explaining what happens at each stage and why. Those notes are not for me. I know what the flow does.
The harder question was how much control to give away. Automate too much and the user has no authorship, and the output stops being theirs. Automate too little and you have handed them a pile of nodes and called it a tool. So I fixed the parts that require expertise, the system prompts and the prompt engineering, and I left open the parts that are actually creative decisions. What you describe. What you reference. Where the copy sits. How far you push the type.
That balance is the whole design.
It Left My Hands
One of my instructors picked up the workflow and built something beautiful with it.
That is the only test that mattered. A workflow that only works when I am driving it is not a tool, it is a habit. Watching someone else run it and come out with work I would not have made myself is the proof that the thing I built was actually a machine and not just my own process written down.
I was proud of that.
The Work That Came Out

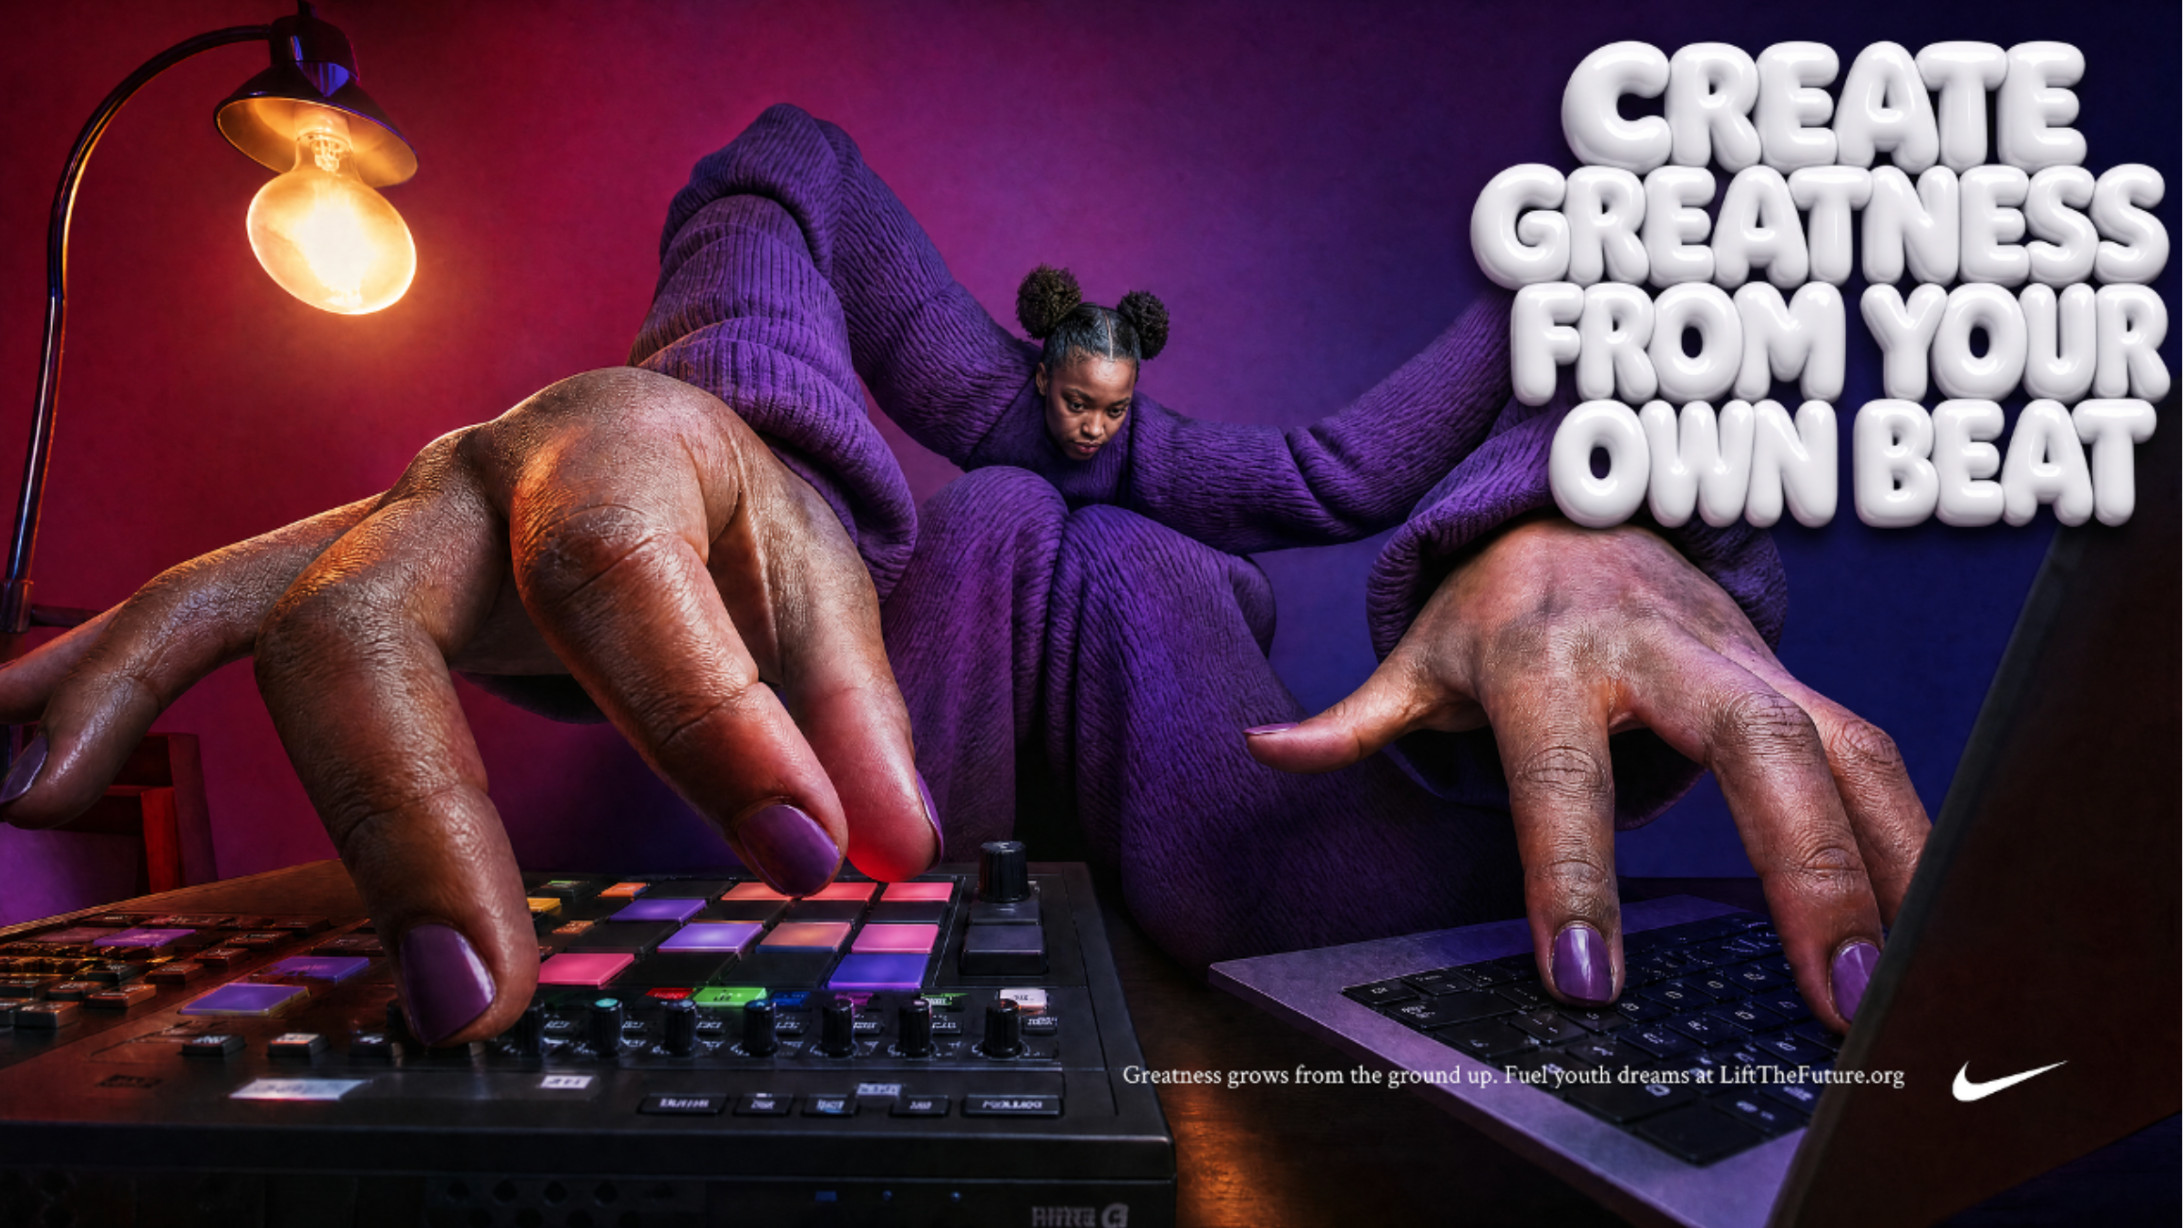
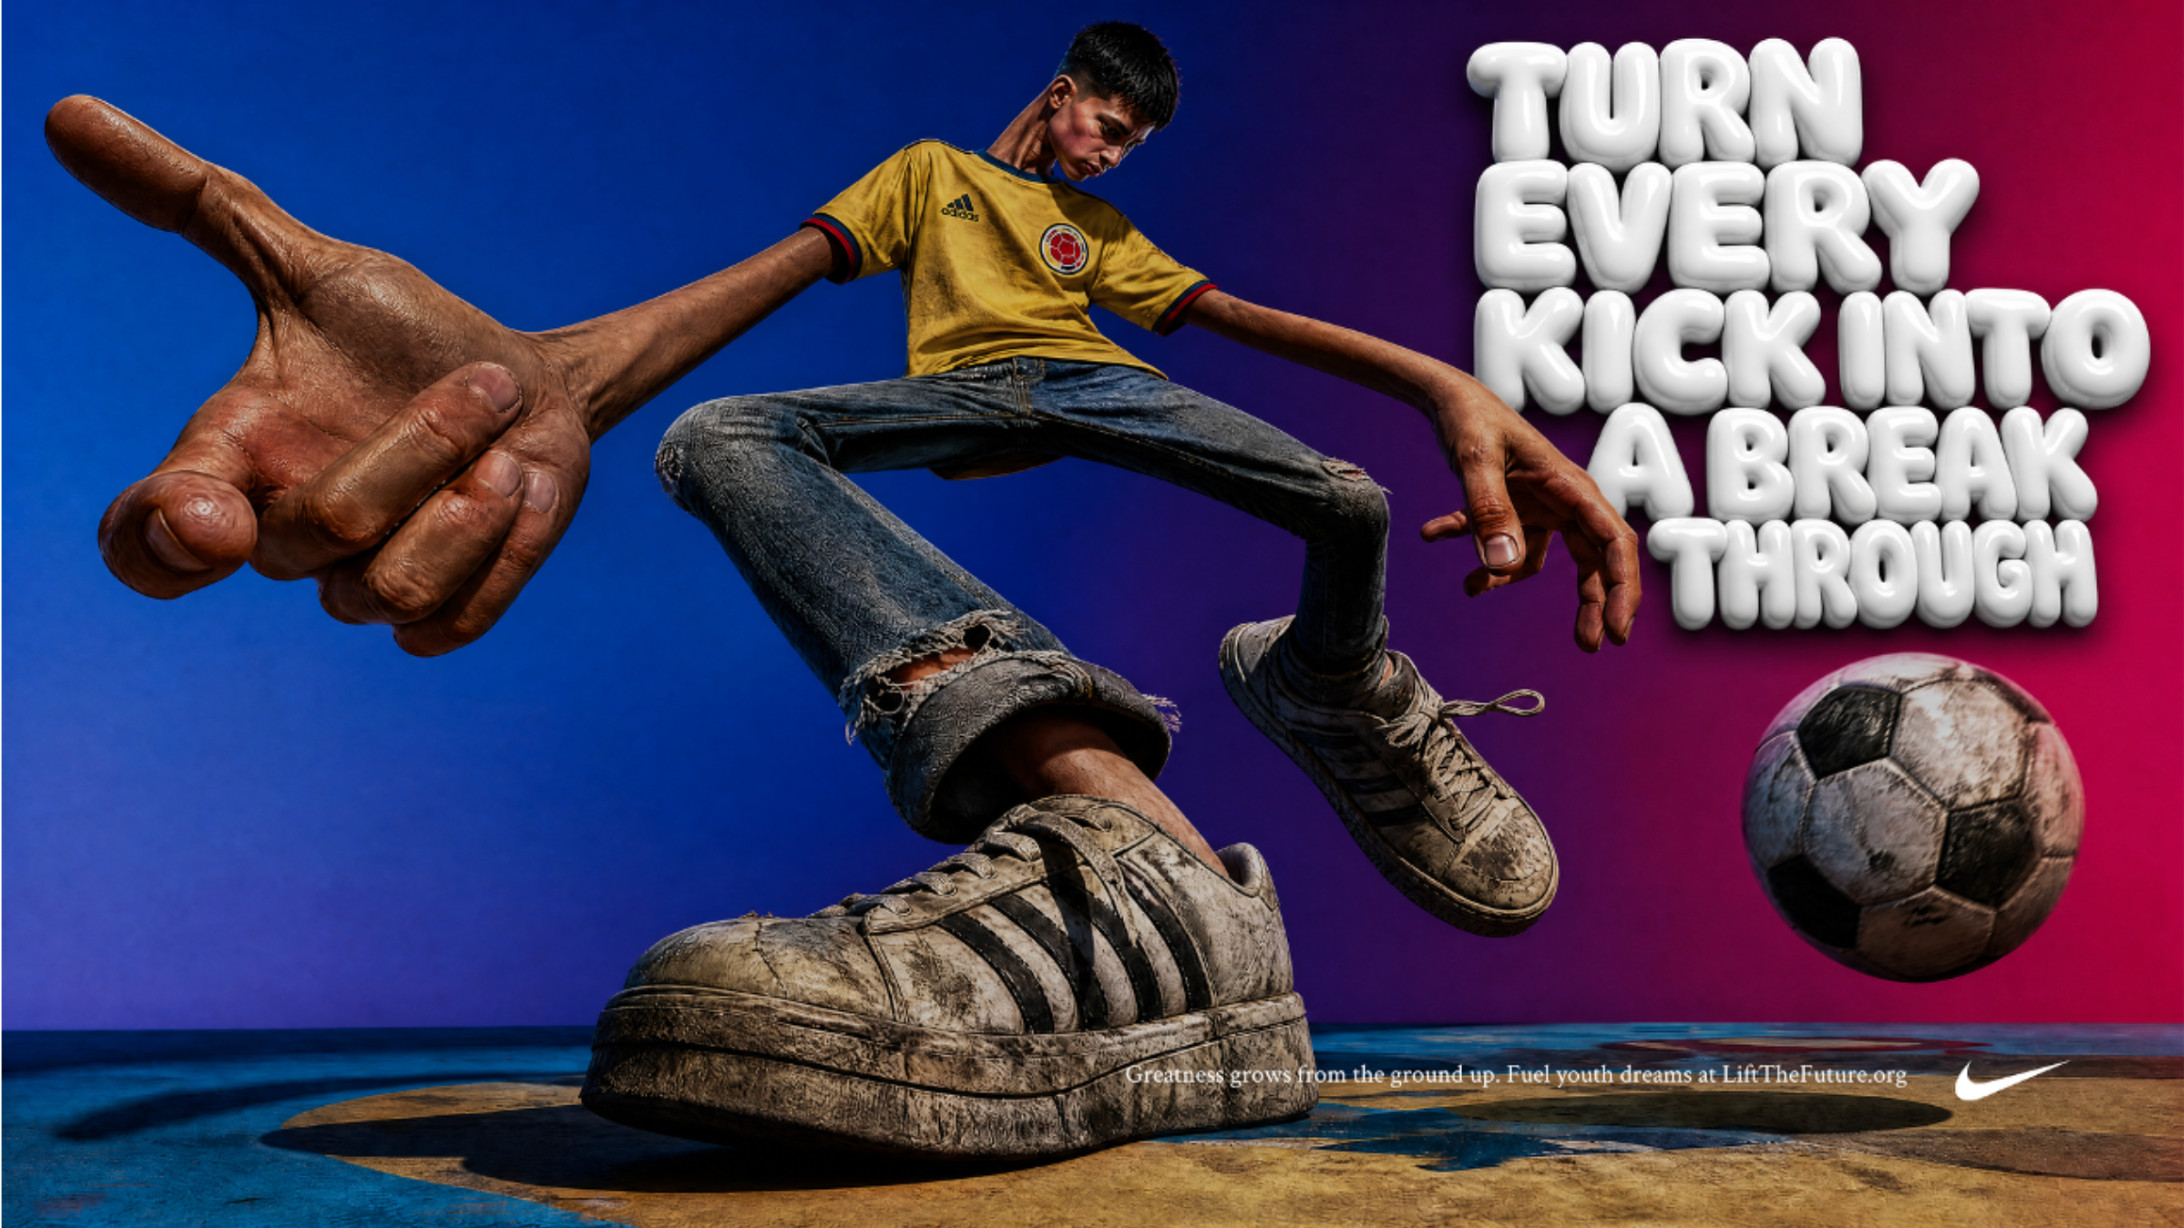 The three finished posters. Spec work, not affiliated with or endorsed by any brand shown.
What You Can Take From This
Build the machine, not just the output. The output proves the machine works.
Let people point instead of describe. A reference image carries a style better than any sentence about it.
Name your groups for what the user is doing, not for what the nodes are doing.
Automate the expertise. Leave the creative decisions open.
The test of a shareable workflow is someone else running it. Until then it is just your process written down.
Learn with Lighthouse: Build Workflows That Enhance Creativity
At Lighthouse AI Academy, we believe that the most valuable AI projects are not defined by the tools they use, but by the systems they create.
Carlos's workflow shows how combining storytelling with AI inside Figma Weave can create faster, more flexible creative systems.
The goal is not to remove the creative from the process.
The goal is to give creatives better tools, stronger systems, and more time to focus on creative decisions that matter.
Because when AI is implemented thoughtfully, it does not replace creativity.
It expands it.
That’s why we teach our students about:
USING AI TO ENHANCE, NOT REPLACE.
View our courses now and build your own systems with purpose.